Pages

Showing posts with label Seamus. Show all posts

Sunday, 26 February 2012

051 - UK Masters Tournament Report: Part 3

Sorry to anyone following these posts for the delay in writing this tournament up - given that it's now over a month since this happened, I hope my recollection of the 5th and final game is accurate!


Game 5: Shared Turf War

Seamus vs. Lilith

Opponent: Neverata

Game Type: Tournament


This would be the 4th tournament in which the Swiss pairing system had put me and Jo to face each other in the final round. We'd previously crossed swords at Leeds (her Lilith killed my Seamus), Stockport (my Seamus killed her Viktorias) and Leeds again (my Pandora killed her Lilith). Jo needed this to settle 2011 at two-all.

I wanted another try at using Insignificant spam so chose my Seamus list. With hindsight, I would have done better with Pandora, and this tournament wasn't really the place for experimenting with different tactics. Jo's Lilith crew included two Lelu, one Lilitu, one Young Nephilim and two Desperate Mercs.

Although I'd saved breakthrough for this Strategy, I had very little in the way of other useful Schemes left so chose Steal Relic, hoping that I'd be able to nip in with Seamus and nab it before pulling him out. Jo took Bodyguard and Grudge.

On my left side, Madame Sybelle and the linked Grave Spirit went up against a Lelu, while on my right side I planned to hold up the other Nephilim twins by throwing a dog at them and hoping Bête could work some magic. Seamus and the Belles shored up my center, face to face with Lilith, the Young and the Mercs.


Fearful of the damage potential of the Mercs and the fact that the Young probably was looking to Grow asap, I made them the focus and killed all 3 in the first two turns for no losses. I threw the Canine at the twins on my right, but Bête Noire proved no match for Lelu and Lilitu, who also lured in a Grudged Belle to beat up. A complete lack of high cards in my hand on the turn after Bête appeared meant her fate was sealed.

Sybelle was outclassed by the Lelu she faced, only managing to damage it slightly before falling to poison, and Seamus ended up on his own, face to face with Lilith.

With all my other VPs looking untenable, I wanted to at least get my hands on the Relic, but with a higher Soulstone pool, Lilith was able to hang onto it and eventually beat Seamus into the ground. In the final turn, Lilith chased down and killed my last Belle who had made it into the Neverborn deployment zone for breakthrough. The game ended a complete massacre and an 8-0 victory to Jo.

Looking back, I played this game terribly (not to take anything away from Jo who did all the right things), and it highlighted to me a lot of the things I'm doing wrong in playing this game, in particular, my poor choices when it comes to picking my fights. This match in particular has given me the impetus to stick with Seamus as my main competitive master in 2012 and to really get the most out of him, and the measure of that will be whether he performs well next time I take him to a competitive event. Watch out Lilith, that's two deaths he owes you now!


Following the 5th Round and after lunch (Maelstrom Games provided a very nice toad in the hole), the top four winners had a playoff to decide the overall winner. From what I've heard, the four games played between Adam (magicpockets), Ian (Calmdown), Ant (Stryder) and Craig (ukrocky) were a smackdown of epic proportions. Knowing that watching these games would be a valuable learning opportunity, I had intended to watch them play out and see the top players at work, but I was offered a game of Puppet Wars which I've wanted to have a try of for a while, so I ended up missing the finals. A four-player Puppet fight kicked off, all of us complete noobs to the game, with Dave (Clousseau) talking us through how it all worked.


3 hours later and with our Puppet Wars game only half way through while the finalists had played 2 full games of Malifaux, we called it at the end of the afternoon. I may post my thoughts on the game in a future post, but in summary: lots of fun, but probably not £80 worth of fun.

That was the end of a fantastic weekend (thanks again to Jo for putting it together), and probably the best tournament I've been to so far. I'm not especially hopeful that I'll be in the top 16 this time next year, but the incentive of another weekend like that one definitely gives me something to strive for!

Sunday, 5 February 2012

048 - UK Masters Tournament Report: Part 2

There were two more games in the afternoon, making for a bit of a marathon of a gaming day, and with the calibre of opponent there was no room for relaxation.


Game 3: Shared Reconnoiter

Seamus vs. Dreamer

Opponent: Calmdown

Game Type: Tournament


This was going to be a difficult matchup. I decided to stick with my original plan of using Seamus and attempting to Insignificant-ify his crew when they showed up, but expected Ian to be fielding the Dreamer. If nothing else, I wanted to try and prove to myself that Seamus wouldn't be a pushover for Chompy.

Ian started with a standard Dreamer crew build containing Lelu & Lilitu, 3 Stitched Together and 3 Daydreams. His game plan was obviously to try and remove as many of my models as possible so that I'd have nobody to contest quarters at the end of the game. For my Schemes I chose Frame for Murder (unannounced) on Sybelle, and Exterminate Dolls, intending to take out the Stitched Together. Ian's Schemes were Hold Out and Steal Relic.

Dreamer prepares to launch his Nightmare Friend at Seamus & Co.
Winning the initiative, the Dreamer did his signature slingshot move and Chompy ate one of my Belles before retreating behind a distant building, a place I knew he would continue to hide his master unless I got one of my models behind his lines. I therefore advanced everyone as quickly as possible towards the center of the table, luring forwards the exposed Daydream and taking him out to try and limit Ian's future mobility.

I won the second turn initiative and put Seamus in Defensive Stance, knowing that he would be the next target and he re-raised the Belle from the nearby corpse to keep my model count up. Chompy jumped out again, and this was where I made probably my biggest mistake of the weekend. Seamus had plenty of Soulstones and managed to survive the first Strike, but in the Onslaught that followed and every subsequent attack I forgot to flip extra cards for his defense! These are the worst kind of mistakes, the "what-ifs". Not knowing how the result might have been different, and knowing the potential effect Seamus could have had on the subsequent turns, means you're always kicking yourself that it could have been different. Ian knew the best way to put Seamus down was to go for lots of negative flips and hope for the Red Joker to inevitably come out. Flipping 4 cards on each damage flip meant he quickly hit the card he wanted and Seamus went down. Whoops for Ian here though as in his rush to kill Seamus, he'd forgotten to Steal the Relic!

After my master was dead, Ian felt comfortable dropping his crew to engage my minions, and the game became a protracted fight in the center of the board. I'm struggling to remember the details of exactly who killed who from that point. One Belle almost made it through in an attempt to deny Hold Out, but was killed before she managed to escape. Knowing that it was my only chance to claw back some VPs, Sybelle attacked and wounded Chompy, and was eaten in retaliation, but this only gained me 1VP. Bete Noire appeared from Sybelle's death and managed to kill Lelu with a timely Slit Jugular, but she was unable to get close enough to the Dreamer to pick him off before being Chomped. I think I managed to put down a couple of Stitched Together, but it was around Turn 5 when the last of my models fell to the Neverborn attack and Ian was able to position his survivors to gain 3VPs for the Strategy which along with 2 for Hold Out gave him a 5-1 win.

This was another excellently played game by an expert Dreamer player. Even had Seamus survived that first round of attacks, he would have gone down in Turn 3 or Turn 4 at the very latest, so I'm not confident that the result would have been much different. Defensive Stance isn't something I've used all that much (and I know that's an issue in itself), so when I did need to use it I completely forgot it was still active. Ah well, lesson learned. I still believe Seamus can hold his own against The Dreamer if played a bit better, and with a slightly more optimal crew selection, so I think I'm going to make that a mini-objective for the year.


Game 3: Shared Distract

Pandora vs Colette

Opponent: 13th Warrior

Game Type: Tournament


The final game of the day used a strategy that I’m not at all familiar with – in fact I don’t think I’ve ever played Distract until this point. The majority of the games I’ve played have used the Core Strategies chart and not the Expanded, mainly because that’s what people tend to prefer in my local meta. The Expanded Strategies are more varied (and dare I say it, more fun), but also have an element of imbalance in that they can advantage certain crews more than others, in contrast to the Core strategies which are generally fairer. Another thing for my 2012 objectives list: Play every one of the Expanded strategies at least once.

For Distract, I knew I needed a fast Master, and one that could either kill the enemy Master or really slow them down. I toyed with the idea of using Seamus again to drop Insignificant on the enemy master and stop them getting any VPs, but he wasn’t particularly speedy, and I suspected I’d be facing Colette who’d be a) hard to pin down and b) dropping SS like crazy to stop me hitting her. I plumbed for Pandora, since I’d have to use her at least once over the weekend, and using her in Game 4 would mean I’d have complete freedom of choice in Game 5.

Rob’s crew was the cookie-cutter Colette crew, with Cassandra, the Coryphee duet and one Performer/Mannequin pair. For his schemes he selected Power Ritual and Breakthrough. I chose Kidnap (2 Coryphee and the Performer) and Assassinate. Kidnap would be a little easier on me as the Coryphee would obviously combine and disappear from the table, and I’d only have to take care of the Performer. Assassinate would be a little harder but my main aim Colette and making her run off the table would be just as good as killing her for that Scheme.

In Turn 1, Rob interacted with the two corners in his half of the board, and ran Cassandra alarmingly fast up my left flank to try and capture another corner. The Coryphee joined into a Duet and positioned themselves ready to rush me on Turn 2. I flew the Doppelganger, and the Madness into the ruined tower in the center, and the rest of my crew shuffled forwards slightly.

Turn 2 was where it all kicked off, with Lilitu casting Lure on Cassandra to pull her away from my left corner. Rob decided that his lieutenant was too exposed on her own, and after some fire-breathing and some swapping about she was repositioned safely in his deployment zone. I foolishly moved the Doppelganger out of cover (I can’t even remember what combo I was trying to line up here – it was late in the day and I don’t think I was thinking straight), and Colette pounced on the opportunity, casting Disappearing Act with her trigger and turning my most expensive minion into a Mannequin.

The only positive from this was that it gave Pandora a nearby target for Incite which gained her some extra movement and allowed her to engage the whole of Rob’s crew. A liberal usage of Soulstones on some casting flips, and a high Crow that I’d been saving for the occasion meant that after Pandora’s onslaught, the Performer and Colette herself found themselves on Rob’s board edge and needing to rally. The Duet shot around my right flank, captured the 3rd table corner and hit a few things along the way, but I wasn’t too worried about it.

I was pretty confident at this point that I had Colette trapped and potentially even run off the board. You might even say I was over confident. Colette rallied and recovered in the next couple of turns, and I realised that fate had deserted me when I drew a hand of cards with nothing above a 5. Colette’s retaliation was brutal and effective. Magician’s Duel, Magician’s Duel, Magician’s Duel. Pandora bit the dust and the Showgirls started to close on my deployment zone. With time running out on the round, Rob picked up his tape measure to move Colette her Wk which would bring her into my DZ and score him points for both Distract and Breakthrough. With the tape measure poised, Jo the Tournament Organiser rushed past shouting “Time’s Up! Tape Measure’s Down!” Unlucky for Rob, this denied him 4 VPs, but Cassandra still got to take her free activation at the end of the game and interact with the final board quarter for Power Ritual to give him the game at 4-2.

Sorry it's taking me so long to finish this series of posts - my very helpful place of work has recently decided to ban blogging from work at lunch time, which has meant I'm struggling to fit time in to write these up. Recap of the final game and the results coming soon though.

Monday, 7 November 2011

035 - GT Warm-Up Tournament Report

Last week I attended a tournament in Stockport organised by Craig (aka UKRocky), intended as practice for next week's UK Grand Tournament (EDIT: By the time this is published the GT will have been and gone). Although I'm not attending the GT, I'd been itching for some Malifaux action after not managing to get a game for the last month or so, and so I decided to go along for the day. There were 14 players there, including many of the UK tournament regulars, but a few new faces also.

The format was designed to emulate the GT, and there were 3 games, each of which had exactly the same conditions as one of the GT games due next week, allowing people to refine tactics and lists. Over the course of the day I played:

25ss Shared Treasure Hunt
35ss Shared Slaughter
45ss Shared Destroy the Evidence
Schemes were unique for the day.

I didn't remember to take any pictures, so I'll keep the battle reports short and sweet.

Game 1:
25ss Shared Treasure Hunt vs. Craig (UKRocky)

Me
Seamus
Sybelle
2 Belles
Punk Zombie
Grave Spirit
7ss cache
Hold Out, Frame for Murder (unannounced)

I decided to roll with my pretty standard Seamus crew, apart from adding in Sybelle with the intention of using her to get to the treasure counter first. I wanted a high cache, as in smaller games like this one the Master becomes even more important and I wanted Seamus to be the lynchpin of the crew, with enough SS to throw some into attacking and not just saving them for defense.

Craig
Marcus
Kaeris
2 Silurids
Student of Conflict
Jackalope
Eye for an Eye, Steal Relic

Highlights
I won Turn 1 initiative and, with a high mask in my hand, used Sybelle to catapult a companioned Belle close to the treasure counter. After a quick rulebook check we quickly both learned that the treasure counter can in fact be picked up in melee (something neither of us had realised), and Craig moved one of his Silurids in to contest the objective.
Marcus charged the Grave Spirit that had linked onto the Punk Zombie, but flipped Black Joker on the damage and had to retreat again causing no damage. Seamus moved to reinforce the developing combat in the center of the board, but was wary of Kaeris so didn't get too close. A .50 calibre gunshot wound to the face took down the other approaching Silurid, despite its camouflage. The first Belle on the scene picked up the treasure, but couldn't escape the melee, and was eventually killed by a Silurid bite and dropped the treasure back where she'd found it.
Marcus took another charge at the Grave Spirit and to Craig's exasperation again flipped Black Joker on damage. Determined to finish off his new nemesis, Marcus took a second Strike action which killed the spirit, but this left him dangerously close to the Punk Zombie.
Winning initiative again, the Punk Zombie obligingly used Flurry on Marcus, bringing him to the edge of death. Marcus killed the Punk, and Kaeris did some serious serious damage to Seamus (bringing him temporarily to just 1 wound!) before casting a Flame Wall to give her Master some cover. Seamus slit the jugular of the other Silurid and healed himself from the brink of death.
Undeterred by the wall of fire, Sybelle charged through, taking 3 damage in the process. Marcus was surprised to see a flaming zombie appear out of nowhere, and Sybelle stripped him of his last wound with an Iron Fan slice.
Kaeris picked up the treasure and stole the relic from Seamus, who hit her back with his Bag O'Tools, making her Insignificant and unable to gain VPs for the treasure. Craig's cunning plan was therefore to use the Student of Conflict to remove her Insignificant in the final turn "until her next activation", meaning she would be Significant at the end of the game and able to score points for the strategy. In another amazingly back luck clip he turned over another Black Joker and she was deprived of the 2VPs for carrying the treasure.

Final score 4-3 to Marcus - We'd both achieved our schemes but nobody got any points for the strategy.

I remembered after the draw for the second round had taken place, that Kaeris should have done a WP duel at the end of the game or count as dead, and that this would have affected Steal Relic and maybe given me a draw, but it was too late by that point. It's a shame to finish on a "what if" like this, as I'll forever wonder if I would be the first person to break Craig's 29-games-long winning streak with Marcus. It's worth mentioning that Craig is placed number 1 in the UK Malifaux Rankings, so I was very happy with the outcome of this game, and was extremely pleased when he remarked that this game was the best he had seen Seamus played.

Game 2:
35ss Shared Slaughter vs. Jo (Neverata)

Me
Seamus
Sybelle
2 Belles
Punk Zombie
Grave Spirit
Bete Noire
8ss cache
Kill Protégé (Ronin), Assassinate

I opted to use the same crew as the previous game, adding Bete Noire for her killing power and resilience - in my experience in a Slaughter she can kill 10+ SS of enemies without too much trouble, and very rarely gives up her own high SS cost to your opponent. An extra SS for Seamus meant he had the full cache and could be my other main damage dealer. My schemes were aimed to synergize with the Strategy, as I'd be gunning for the Masters anyway for the additional point (and to stop them slicing my own models into small chunks of dead meat)

Jo
Viktorias
6 Ronin
5ss cache
Hold Out, Eye for an Eye

Highlights
4 of the Ronin advanced up my right flank, with the Viktorias and the other two Ronin (including my Kill Protégé target) moved forwards on my left. My plan was to keep my entire crew to the left, moving around the large obscuring building in the middle, and try to take on Jo's crew in two halves. Unfortunately my guys got bogged down in melee in the center, allowing the 4 additional Ronin to catch up to me on Turn 3 and meaning I had attackers on both sides.
A Belle lured one of the Ronin accompanying the Viks, attempting to split that group up too and prevent a massed charge, but even with the help of the Punk Zombie she was unable to kill the target due to Hard to Kill. One of the Viktorias became engaged in combat with Seamus, Sybelle and a Belle, and wounded them all, but she took heavy damage in return. She suffered a barrage of attacks from most of my crew in Turn 2, but she weathered the storm of blows by burning through her entire cache. She managed to hang onto her last wound before swapping places with her sister further back. I also faced a particular dilemma twice in a single turn - what do you do if you want to Flurry (requiring that you discard a card to make 3 strikes) but all three of the cards in your hand are 11+? I opted to just Strike twice, and I'm still not sure whether that was the right decision.
Jo sneakily committed Sepakku with the Ronin that was my Kill target, gaining herself another two soulstones and depriving me of two VPs.
The center melee was joined by four fresh Ronin, but Bete Noire appeared from the body of one and slit the jugular of another two in an impressive knife display, while the last Ronin failed her Terror test and ran away crying after trying to charge Seamus.
The fresh Viktoria managed to finish the job on Seamus, but was killed by my crew's counter attack. With only one Vik left (and on 1 wound), Jo opted to retreat, but my remaining models were unable to catch up to her. I made sure one of my Belle's sprinted forwards for the final two turns to end the game in the enemy deployment zone and deny Hold Out.

Final score 2-1 to Seamus - Neither of us had achieved any Schemes, but I managed to claw a few VPs in the very complicated Slaughter conditions, while Jo gained a point for killing Seamus.

For Jo and me, this was our 3rd competitive matchup to date. It seems that whenever we're both at a tournament we're guaranteed to get drawn against each other, but I'm not complaining as she's always fun to play. It was a nice surprise too to see her using a different master as I was expecting to be facing Lilith again. This game regains Seamus' honor (slightly anyway...) after she beat him with Lilith in the first Leeds tournament back in May, and I'm sure she'll be looking forward to get a game against my Pandora at our next clash to try and equalise that score too. Actually... maybe not. Nobody looks forward to playing against Pandora.

Game 3:
45ss Shared Destroy the Evidence vs. James (MythicFox)

Me
Seamus
3 Belles
Punk Zombie
Onryo
Crooked Man
Shikome
Grave Spirit
3 Canine Remains
6ss cache
Army of the Dead, Bodyguard

This was the first time I'd ever played a game above 35ss, and I was at a bit of a loss about what to take. I swapped out Sybelle and Bete for a Crooked Man (intended for objective denial), a Shikome (intended to objective capture) and an Onryo (an additional damage causing body). I brought the 3 Canines intending to use them to gather up Corpse Counters and send them to Seamus for the Army of the Dead scheme.

James
Zoraida
Collodi
4 Marionnettes
1 Wicked Doll
Bad Juju
Mature Nephilim
Insidious Madness
5ss cache
Kidnap (Canines), Kill Protégé (Shikome)

Highlights

I’ve found in the past that Shared Destroy Evidence can often come down to whichever player wins the first activation flip, as so many crews out there have enough movement tricks to get to the center Evidence on the first activation and begin the game with a 1-0 unrecoverable advantage. I knew Collodi was capable of some movement tricks but MAN is he fast! Winning initiative with a 13, James activated Collodi and his Marionettes, who proceeded to run up the board at incredible speed and destroy two Evidence markers (both requiring a (2) Interact action and being 8” apart and 12” from his deployment zone!) within the first activation of the game. They were part of the way towards destroying a third when their momentum ran out.

At a bit of a loss of where to go from there, and with Collodi rather close to my deployment zone, most of my crew moved up table slowly, being wary of Bad Juju who had popped up on my right flank. The Shikome declared the Insidious Madness as prey and began to stalk it, but it stayed put and the winged demon was denied any extra movement. Zoraida, with a vantage point on top of a pillar, cast Obey on the Mature Nephilim, and her summoned Voodoo Doll did the same thing, which meant it was close enough for a diving tackle into my lines. The Mature Nephilim made short work of the Shikome before getting mobbed by several of my crew in an attempt to stop it destroying move evidence markers. It wore them down though, including the last Canine Remains that had dived in the combat to try and pick up Corpse Counters to send to Seamus.

The Punk Zombie charged Bad Juju and with a fortunate Red Joker managed to put it down, in the uneasy knowledge that it would be back next turn. It did so, and parked itself on one of my evidence objectives. Zoraida watched over another evidence marker, casting Obey to make any of my models that tried to get close to it, to turn around and walk away.

In my deployment zone, Collodi made a dash for the last piece of evidence and destroyed it. I’d already marked him for death after his first turn escapades, but this took the biscuit and so, in the knowledge that I wasn’t going to come close to achieving my strategy in the few turns remaining, I decided that he needed to be taught a lesson. The Punk Zombie used Slice and Dice with another Red Joker to cut down all of his nearby Marionettes, and then Seamus finished off Collodi once he was unable to bump hits onto his puppets.

Final score 8-3 to Zoraida - The board was littered with corpse counters, mostly from my own crew, so I picked up 3 VP for my schemes but nothing for the Strategy, whereas James had completed all his objectives.

James is a pretty regular opponent of mine, being from the same locale, but this was only our second competitive matchup, putting us at 1-1. I’m not sure about whether I liked the larger scale of the game or not, It might just be that I’ve grown comfortable with 35SS, so I’m willing to play a few more larger Scraps and see how I get on, but it felt at times like the game got a little bogged down with the larger number of models on the table. James played exceptionally well and gave me no real mistakes to capitalize on (except maybe forgetting about the Punk’s AOE damage – but Collodi had served his purpose by that point), whereas I made a number of blunders. The Shikome should have had the Mature Nephilim as its prey instead of the Madness; Sybelle should have been in the crew to attempt the Turn 1 Belle Catapult tactic etc.

All in all a very enjoyable tournament! Thanks to all my opponents and to Craig for organising the day.

Mike

Friday, 1 July 2011

021 - Avatar Forms Preview (Seamus & Sonnia)

I was very excited to see the preview on the Wyrd forums yesterday which showed off the concept art for two of the Avatars that will be pre-released at GenCon in August.

For those not already familiar with the upcoming releases, GenCon will see the release of Twisting Fates, the second expansion book for Malifaux. Unlike Rising Powers the book will not be filled with new Minions (although there will be a few), and it's not expected to have any new Masters. What it does have, though, is new rules for Avatars, which are different forms your Master can turn into mid-game once certain conditions are met. It's also likely to be a temporary effect.

At the moment I can see this working one of two ways:

a) All masters will gain a (1) Avatar ability which will need a particular trigger and/or high casting value, or
b) Different masters will be able to transform into their Avatar after meeting some criteria specific to them eg. Chompy may transform after eating an enemy model.

Malifaux co-creator Eric Johns has explained that the Avatar isn't a plain upgrade in that you're always going to want to transform as soon as possible. Instead it will be a situational ability that will change the Master's abilities, making them more powerful in some areas but nerfing them in others.

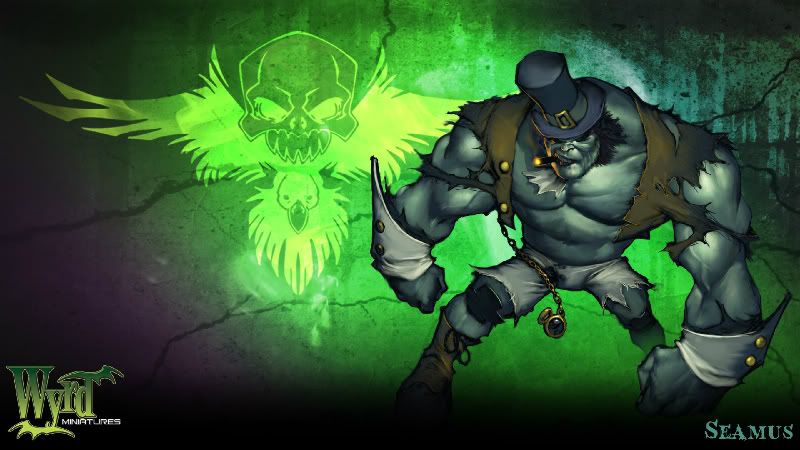
A good example of this can be seen in the awesome concept art released for the Avatar for Seamus


Clearly channeling Mr Hyde, when he transforms into an Avatar Seamus looks like he's going to grow massively both in stature and physical strength. On the flip side, it appears that he will lose his .50 Flintlock, and I'm willing to bet that most of his ranged spells will go too. Clearly there will be times when you want Seamus in his regular form, and times when he will be best off transforming. I don't think his Bag of Tools is going to be getting much use once he replaces it with some Smash-Fu!

Also previewed is the "Alternative Seamus", which will be one of a series of alt Master sculpts, purely for the sake of making some nice new models. From the look of alt-Seamus with his ripped shirt, it seems that maybe the alt sculpts will depict the master after their Avatar transformation, so you could swap to the Avatar model for a turn then bring out the alt sculpt when the effect expires. If true it's a really nice idea!


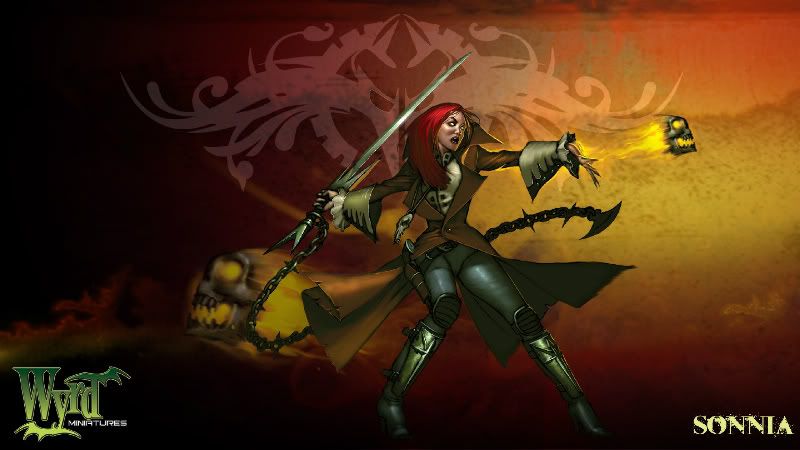
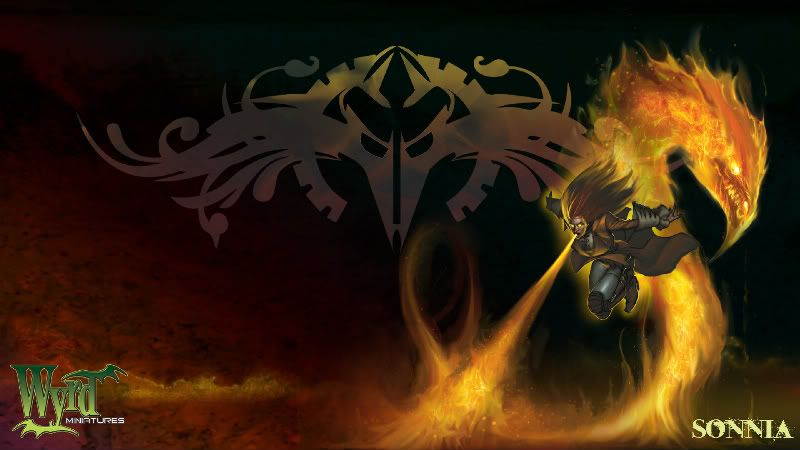
Also previewed were the Alternative and Avatar forms of Sonnia Criid. I've never been that taken with Sonnia until now, but the alt-Sonnia just looks so much cooler than the current version, and her Avatar form looks to be absolutely beautiful. I've no idea how that would ever fit onto a 50mm base. Well done Wyrd for making even one of the least appealing Masters (to me at least) suddenly look very attractive indeed!


I was hoping to cut back on the Malifaux spending for the next couple of months and focus on getting my painting backlog under control, however I don't think I'll be able to resist buying the new Seamus stuff when it comes out in August. We haven't even seen the Nightmare edition models yet!

I'm hoping for a Nightmare Baby Kade, complete with pram! How about everyone else?

020 - Battle Report x 2 Seamus vs Leveticus/Pandora

I'm afraid to say my ranking in the local league took a nosedive this week after a run of bad games. Where I was in 4th place last week I'm now in last place (11th). In our league, rankings are calculated on a rolling 3 week interval, so a few bad results can have a big effect on your standing.

Seamus vs Leveticus
I first played against Craig's Leveticus crew, which would be my first game against the Steampunk Necromancer.

Craig brought Levi, Alyce, 4 Steampunk Abominations and 3 Necropunks, while I had Seamus, Copycat Killer, Sybelle, 2 Belles, Hanged, Onryo and Punk Zombie. My strategy was Slaughter and Craig was playing for Destroy the Evidence. In the early stages of the game I was incredibly wary of most of his models as I couldn't be sure what tricks they were going to pull against me, and this meant I struggled to be pro-active in my tactics.

Levi took the occasional pot shot with his spells to wear down my Belles, while the Steampunk Abominations rushed down the centre-table and combined into a Desolation Engine. Although the Engine did kill Madame Sybelle, the combined efforts of the rest of my crew managed to put it down and score me an early lead on Slaughter. I couldn't keep up the momentum though, and when Rusty Alyce came forwards later in the game to start sniping my models (killing 3 minions including a headshot against my Hanged..! *sob*), my forces became too depleted to be able to fight back.

I did almost manage to deprive Craig of his last Evidence marker, when my Onyro brought down the Necropunk that Craig was relying on, but in the end Leveticus had two whole Turns to finish off the Onryo and claim full VPs, whereas I'd failed to score any!

I did enjoy the game though, and learned a lot about how Leveticus works. His mechanics are quite unusual on paper, but I don't think they affect how you should play against him too much. One thing I did come up against was his ability to deny me my Corpse Counters. His models didn't leave any, and often mine didn't either when they were killed by particular spells. At one point I had a hand full of high crows ready to summon some Belles, and Levi just summoned a new Steampunk Abomination before I had chance.

Seamus vs Pandora

This was another complete drubbing for me, although I discovered afterwards that this was mainly because Adam, who was bringing his Pandora crew out of retirement, had slightly abused Pandora's "Project Emotions" ability.

My crew was Seamus, Sybelle, 3 Belles, Hanged, Grave Spirit, Onryo, Punk Zombie, and Adam had brought Pandora, Poltergeist, Baby Kade, Doppelganger, 2 Insidious Madness and 2 Stitched Together. Despite having Pandora myself this was the first time I'd faced her, and it was interesting for me to see a Pandora list played without Sorrows. At first it seemed that Adam would be using the Insidious Madness in base contact with her as replacements for Sorrows, but as he got closer they separated and Pandora moved around using different Woes as cover each turn.

The Strategy was shared Claim Jump. I started off well by wounding one of the Stitched Together and killing Kade on one flank, and taking out one of the Madnesses in the center. This unfortunately left many of my models bunched together and Adam used this opportunity to cast Project Emotions (with Mental Anguish trigger) with a high enough casting total that Seamus, Sybelle and a Belle were all caught under the template and forced to flee from one action. (I've since checked and found that the trigger should only be applied to the target, so Adam shouldn't have been able to do this! Ah well... we live and learn)

From Turn 4 onwards I was on the back foot, with Pandora well established in the center of the board and half my crew too far away to affect anything before the end of the game.

I'd also kept a Belle safely back in my deployment zone when I realised that Adam had taken Kidnap as one of his schemes. Unfortunately I'd mis-judged which 3 models he had chosen and this Belle was unable to contribute to the game at all. Luckily the other Belle (the scared away one) was the last model left for his scheme and she survived til the end due to having legged it across the board, so he was only able to score 1VP for Kidnap.

The final result though was 7-1 which, although not as bad as against Leveticus, meant that I'd lost my most recent 3 games and fell to the bottom of the league table.

The only way is up!

Sunday, 15 May 2011

015 - Leeds Wargaming Centre Tournament

Oh dear is it really a month since I last updated? Shame on me! Luckily I haven't been wasting all that time, I've spent it preparing for last week's Malifaux Tournament!

Held at the Leeds Wargaming Centre on the 7th May, the event was organised by the local henchman James (also goes by the name Mythicfox) and it was a lot of fun. All photos in this post were taken by my girlfriend/official photographer Charlotte (http://justcharlotte88.blogspot.com)

Ade considers his next move

The format was three 35ss games with a fixed master but flexible crew selection with games using the Core Strategy table. Schemes were restricted to one use only on the day.

My crew
I'd spent the last few weeks painting a variety of models to go with Seamus to give me a bit more flexibility, but come the day of the tournament I opted to stick with the same list in all 3 games.

Seamus
Grave Spirit
Madame Sybelle
3 Rotten Belles
Punk Zombie
Hanged
5ss cache

I benched Bête Noire and the Copycat Killer (who had both been underperforming in my practice games) and swapped in the the Grave Spirit and a Hanged Man that I painted from start to finish the evening before the event.

The undead assembled for their group portrait

The Games
Round 1


24 players attended, and the first round was a random matchup. My first opponent was to be Mitch (aka Stern) who'd brought his lovely lovely Perdita crew. This crew was the well deserved winner of the Best Painted prize.

Perdita (riding a dinosaur - someone made the very true observation that "EVERYTHING becomes cooler if it's on a dinosaur")
Drill Sergeant
Niño
2 Guild Guard
Austringer
Misaki

I flipped Reconnoitre, and opted to Grudge one of the Guard and Hold Out, while Mitch had Treasure Hunt and Bodyguard and also opted to Hold Out.

Setting Up on one of Kaine's scrumptious boards

The Grave Spirit linked onto the Hanged to give him armour, and together they soaked up a lot of the Guild's shooting, taking just one Wd per shot after reductions. I took advantage of my Belle's speed to run her into the centre to guard the treasure before Mitch's forces arrived.

They advanced slowly, using the Guard's Cordon ability to try and prevent me reaching their deployment zone. A couple of Lures though was all it took to pull my Grudge target forwards for an early 2 VPs. The Austringer hiding in nearby ruins took the occasional pot shot at me from behind cover, the cowardly little bird-lover.

Misaki took out the Belle in the centre with some impressive damage but was taken out herself by the Slow to Die retaliation! The Drill Sergeant tried to make off with the treasure but didn't get far as I had 3 models bearing down on him, and before long the treasure was safe in the hands of my Belles.

On the other side of the table, Seamus entered the woods with Sybelle and the Punk Zombie for support, while Perdita and the other Guardsman entered from the other side. The trees afforded my guys some good cover from Niño, who found himself with a lack of targets until he got Lured over and smacked about the head by another Belle.

Nino thinks he's got the drop on Green Belle, but finds her too irresistible to kill

Perdita and Seamus traded blows and severely weakened each other but neither could manage a killing blow. The Punk stepped up to the plate and managed to get a Flurry against Perdita, but forgot to use his Paired swords for two of the strikes! Luckily she was weakened enough by this point that his 3rd and final strike finished her off.

At this point Mitch only had the Austringer, whereas I had all my models surviving (albeit heavily wounded). I spread out to complete my Reconnoitre, claiming 3 of the table quarters. In the closing turn of the game, the Austringer got a sneaky shot or two at Seamus and the pesky blue-tit (or sparrow or whatever it was!) managed to land enough damage to kill my master!

I wasn't too upset though, as I'd managed a 6-0 victory in the first round.

Round 2
After a lunch break and after the crews had been displayed for the Best Painted award, my second game was to be against Ian, one of the Night Owls regulars that I hadn't yet had chance to play.

Viktorias
3 Ronin
Friekorps Librarian
Friekorps Trapper

This was another master that I'd never faced before and I think that, with hindsight, I was buoyed up by my first round win and I severely underestimated them.

My strategy was Destroy the Evidence, with Steal Relic and Army of the Dead as Schemes. We asked for a ruling from the tournament organisers regarding whether I could steal the relic from either Vik or if one had to be nominated at the start, and it was decided that I could take the Interact action against either model. I fancied my chances for this scheme, and also Army of the Dead, given Ian's low model count.

Ian had Slaughter, and also had to Stake a Claim on the house on my side of the table, and had a Grudge against the Punk Zombie.

Looking to thin out the enemy quickly, I lured one of the Ronin across to my side of the river, but she was saved on her last Wd by being Hard to Kill. This cost me my Punk Zombie early on, as with melee expert she was able to take him down quickly in retaliation.

5 against 1.. should be easy right?

I made the silly mistake of luring the sword Vik closer to try and separate her from her sister. She responded by charging in and killing Madame Sybelle and one of the Belles guarding Seamus with a Whirlwind. Also piling into the combat were the other 2 Ronin, who used a push off the Belle I re-summoned to get into melee with Seamus. I put the hurt on Viktoria, but not enough to kill her, and she teleported out for the fresh gun Vik next turn.

Seamus was then on his lonesome, on 1Wd and surrounded by gun Vik and 2 Ronin. I didn't realise until long after the game that I'd forgotten his Necrotic Ministrations ability (which would have healed him 6Wds and 3 cards from the Belles dying around him), and so he may have survived a little longer. I'd already wasted some actions on trying to steal the relic, but was starting to see that scheme as my only chance of getting any VPs, so Seamus tried again and succeeded (scoring 1VP), also putting up his Terrifying aura. Undeterred, Viktoria passed her morale duel and took his final Wd.

My last couple of surviving models found themselves outnumbered and blocked off from the Evidence markers and unable to achieve anything until they too were killed. To add insult to injury, Ian discovered the Friekorps Trapper had the Gravedigger trait, and proceeded to hoover up all the corpse counters and deny my other scheme.

I can't fault Ian, who played his crew very well, but next time I'll come prepared for the Vik's potential damage output, and take more care positioning models to avoid Whirlwinds!

The final result was 8-1 to Ian.

Round 3
Going straight into the final round, I was drawn against Jo-anne (you may know her by the name Neverata) and compact but deadly Lilith crew.

Lilith
Lelu
Lilitu
2 Mature Nephilim

With so few enemy models, I was hopeful when she flipped Reconnoitre - if I killed just 2 models and piled my models into one quarter she'd be unable to contest it and fail her Strategy. She also took Bodyguard and Hold Out. My final Strategy of the day was Claim Jump, which I decided to pair with Stake a Claim and Bodyguard.

This being the first time I'd played a Claim Jump, I made the mistake of heading all my models there at the start. I think I'd have done better if I spread out a bit and moved towards the marker later in the game.

As it was, Lilitu used Lure to get Sybelle all the way across the table to get ripped up by Lelu. I think she managed to cast Lure at least 5 times in a single activation.

The Matures outflanked me on the left, and dived over the castle in the centre to charge and engage most of my crew. One was brought down by the combined efforts of several Belles, but then bled all over the survivors. Seamus attempted to escape (again forgetting his Necrotic Ministrations) but was unable to get free of the melee.

In one memorable moment, I took a call to attack a Mature that was close to Seamus even though he was on his last Wd, as I believed him to be further than 1 inch away. When it came to measure the distance, it was so close to an inch it was impossible for us to call so we had to ask for an independent ruling, which went in my favour (just!).

It didn't save Seamus for long though, as Lilith then joined the fray and went to town on him.

On Turn 4 my only survivor was the Hanged, and he didn't last long from the combined attacks of Jo's crew. She still had 4 models left, which was plenty enough to spread out and claim a 8-0 victory.

The Hanged suddenly realises his day is about to get much worse

The Results
With only 3 Tournament Points to my name from the first game, and 2 complete pastings from rounds 2 and 3, my final placing was 19th out of 24. Not very impressive, but for my first ever tournament I'm happy enough!

The overall winner was Craig Johnson and his Collodi Crew, with Paul Hansel and Rob Owens taking 2nd and 3rd with their Lilith Crews. My opponents Mitch, Ian and Jo-anne placed 5th, 7th and 6th respectively, so I can always claim I was beated by some of the top players!

A good day was had by all, and I'm now looking forwards to my next tournament experience

Mike

Sunday, 10 April 2011

013 - Battle Report x2 - Seamus vs Kirai/Lady Justice

In the last week I've played a couple of games with Seamus, whose crew I've been painting as a break from my Neverborn. I'll be showing off a few pictures of them later this week. Both games were played at the new Leeds Wargaming Center in Leeds, and so I was able to use the gorgeous Malifaux terrain boards there for the first time. There are three Malifaux boards at the store, all made from Hirst Arts plaster blocks, and they're a joy to play on. Both games this week were played on the "Soulstone Gin Distillery" board. You'll have to excuse the poor quality photos - I'm beginning to realise that my iPhone is woefully inadequate for this kind of photography!


The first game was against James, the local Wyrd Henchman, who wanted to try out his Kirai crew. I get the feeling she must be flavour of the month, as this would be the 3rd game I'd played against Kirai (and I'd only played 5 games total!), however I thought I'd be ok as I'd already seen all the tricks she could pull. I thought wrong.

Me: Seamus, Madame Sybelle, Copycat Killer, Bete Noire, 3 Belles, Crooked Man
Strategy + Schemes: Slaughter + Hold Out & Kill Protégé (Shikome)

James: Kirai, Lost Love, Shikome, Hanged, 2 Onryo, 3 Seishin
Strategy + Schemes: Destroy Evidence + Hold Out & Grudge (Belle).

James managed to completely out-manoever me through the whole game. By activating his Seishin towards the start of his turn and merely declaring Defensive Stance, he managed to force me to commit my model's activations before he could react with his more powerful hitters.

The Shikome in particular (who I foolishly declared as the target of my Kill Protégé scheme) used it's total combined movement of 15" to fly about the table each turn, firstly despatching the Belle that was its Grudge target, and then destroying two pieces of Evidence, and then hiding deep in my deployment zone without me being about to pin it down and kill it. At one point Kirai used Swirl Spirits twice to swap the Shikome with another model twice, and effectively teleport it to the other side of the table!

Path of the Shikome
I learned the hard way that I need to be careful when choosing my moment to reveal Bete Noire. When the Ikiryo appeared in my lines in the first turn and killed one of the Belles, I impulsively brought out Bete early who took her inevitable revenge, but it left her somewhat stranded and unable to do damage to the rest of James's crew. I also overestimated the damage she'd be able to do, since when halved against Spirits it was quite pitiful, and I now realise she definitely needs to appear next to her target to be able to Flurry. Moving or charging and making a single attack just isn't enough for her to kill most things.

James managed to destroy all three pieces of evidence, and I managed to whittle down his forces enough to complete my Slaughter objective (ever reappearing Seishin make it particularly easy to bump up your models-killed total). Neither of us managed our Hold Out objectives, and James had satisfied his Grudge. When I failed to kill the Shikome in Turn 6, I thought it was all over, but the cards dictated that the game would go on for a further turn. In Turn 7 I still couldn't bring the damn thing down, nor in Turn 8 when the cards were kind to me yet again! When it got to Turn 9, James realised that Kirai could use Sacrifice Spirit to remove the Shikome from the table and prevent me from killing it! Next time I face Kirai I'll be very wary of taking any schemes which require me to "kill" things, as shenanigans like that would make it impossible to secure VPs. I may find it hard not to declare Grudge against this particular Shikome though!

At the end the victory points came out at 6-4 to James, a close fought and very enjoyable game.


Later in the week, after I promised not to use Pandora against him, Paul agreed to another game, and this time he left his traitorous Puppet Deck at home "on the naughty step".

Me: Seamus, Madame Sybelle, Copycat Killer, Bete Noire, 3 Belles, Crooked Man
Strategy + Schemes: Slaughter + Bodyguard & Stake a Claim

Paul: Lady Justice, Samael Hopkins, Santiago Ortega, 2 Witchling Stalkers, 2 Guild Guard, Death Marshall
Strategy + Schemes: Line in the Sand + Extermination (Belles) & Hold Out.

Things started well. I managed to take out one of the Guild Guards in the second turn, and protected the dynamite counters in the center of the table by using the Crooked Man to guard them with a Shafted marker, which meant that any of Paul's models attempting to light the fuses would run the risk of death or paralysis. Two of my Belles moved to my left to protect two of the other dynamite counters, facing up to the Witchling Stalkers, while the rest of our forces converged in the centre of the distillery.


In the almighty ruckus that followed, I severely wounded both Samael and Lady Justice (with hindsight, I should have focussed my fire better to bring down at least one of them), but Lady Justice managed to skewer Sybelle and then, after Seamus failed to disengage and make a run for it, she sliced him up too - one attack managed to inflict 12 Wds on him!

With my master lost, and severely outnumbered, the only way I could claw back some dignity was to try and defuse enough of the dynamite to stop Paul achieving full VPs for his strategy. The two Belles in the corner did reasonably well, managing to disarm one of the dynamite counters and took down a Witchling Stalker, but one of them died as he exploded leaving me with a single model left at the end of the game.


The final total was 6-0 to Paul, another fun game in which Paul reclaimed his honor. We agreed to count this result towards the Malifaux league/campaign that recently started at the Night Owls gaming club.

Lessons learned this time are:

1) If you see Lady J coming towards your master, just run! If she gets close, even Hard to Wound 2 and Hard to Kill aren't going to save your ass. That goes double if one of your Schemes is Bodyguard!
2) I need to remember to focus fire on dangerous targets - instead of splitting my attacks on several enemies.
3) Crooked Man didn't do all that much in either game. I'll probably drop him next time and try something else.

All round not a very inspirational start for my Seamus crew - hopefully they'll improve as I get more used to how they work!

Mike