Pages

Showing posts with label Painting. Show all posts

Tuesday, 18 March 2014

090 - Tale of Malifaux Bloggers - Part 2

Welcome to the next exciting instalment! In this post I'll be covering my progress with my Misaki crew from 19th February - 18th March. Previous posts tracking my #ToMB progress are here:
Part 1


Modelling/Painting

It will come as no surprise to many of you that I've completely missed the deadline when it comes to getting my initial crew painted. Total proportion of models completed = 0%.

However, it isn't all bad! I did manage to slap some colour on 7 out of 9 of the models, and almost finish Misaki herself. She's had to be put on hold temporarily while I order up some new thinner drill bits. I had hoped that the weapon swap would hold with plenty of Liquid Poly glue, but every time I repair it, it falls off a couple of turns into the very next game. I'm therefore going to take the plunge and drill out Misaki's hand, replacing the weapon with something more solid like a brass rod.

I've taken the unusual (for me) decision to paint this crew all at once, instead of my usual system which is to focus on one model at a time. I've found this has helped with getting a feel for what the entire crew is going to look like, allowing me to plan and balance colour schemes on each individual model.


As you can see, I'm going predominantly turquoise and yellow, both colours that I have zero experience of so I'm way out of my comfort zone here. That being said, I'm enjoying the challenge of working with something new, and the vibrancy of the colours on the tabletop makes my crew really stand out.

I'll talk more about colour choices and specific painting techniques in future posts, however given the lacklustre progress I think it's necessary to motivate myself to get more painting done in Month 2. Part of the difficulty with #ToMB is that the painting is frontloaded into Month 1 with more than twice as many figures to complete in the same time period, so with the pressure easing in future months I think I should be able to catch up. To make this ambition a reality though, I'm going to commit to producing a painting diary for Month 2. I'll report back with a daily record of what I achieve - hopefully that will give me the kick up the arse to stop procrastinating and progress faster...


Gaming

I've had a fair few games with Misaki over the last month, and I really feel like I'm starting to get the hang of her and her crew. I'll save a more in depth analysis of individual models for a future post, so for now I'll just touch on some of the main things that I feel like I've learned as a complete beginner to the models.

  • Many Ten Thunders upgrades have the requirement that you must discard the upgrade at the start of your activation to get a bonus, and coming from a faction that had none of this type of thing, I'm finding I forget *consistently*. More than one game has been lost due to sending Misaki on an assassination run half-cocked, only for her to come within a hair of killing her target and then falling over herself. Solution? I've started leaving a bead/marker on the table next to Misaki that follows her around, so that I see it before I move her anywhere and consider my upgrade options first!
  • If Deliver the Message or Assassinate is in the scheme pool, they seem to be very attractive options for your opponent to choose. Deliver the Message is reasonably easy for Misaki to dodge though - she can charge into melee and then make sure she pushes out of engagement range on the last attack using the automatic Next Target trigger.
  • Deadly Dance seems very situational - I've never felt it a worthy enough contender for her APs to use it. That being said, I can see it being used in conjunction with the Disguise upgrade to prevent any enemies engaging Misaki that she doesn't want to be engaged by. At 2SS for Disguise though, that becomes a costly tactic that I'm not yet sure how to maximise.
  • Smoke and Shadows is a very nice upgrade indeed - I haven't yet managed to pull anything tricky with it, but I can see the potential.
  • Cutpurse and Untouchable I've also not yet used - Stalking Bisento and Recalled Training seem like stronger upgrades overall, but I plan to experiment with different loadouts in the coming months.
  • Shang has been a nice extra when I have SS to spare - the extra card draw each turn practically pays for his hiring cost, and the extra activation is useful to stop me getting swamped by larger crews. I've been told of some filthy healing combos in a Misaki Outcast crew that I may get around to testing out in the future too.
  • Torakage are solid 6SS minions. I love the thematics of their Rapid Fire combined with automatic Leaf Steps triggers to get them where they need to be, and with Wk6 they've made excellent objective runners. Sneaking one down a flank has worked a couple of times to drop scheme markers for Breakthrough or similar, then bury using Smoke and Shadows only to reappear in the thick of the action once they'd achieved their mission.
  • I'm yet to see Ototo do anything impressive, unfortunately. At 10SS basic he's very pricey, and his 1SS upgrade gives him a trigger that, while synergistic, isn't especially that much more powerful than to Critical Strike and still relys on you to be sitting on a high Ram in your Control Hand to get the most out of. Admittedly the (0) action it also grants is powerful in it's own right, but that's 11SS in one package - almost two Torakage! I haven't given up on him though - I'll be making a point of trying to get more out of him in Month 2 games.
  • I'm loving Thunder Archers, particularly for getting themselves situated with LOS to the objective in something like Turf War and just pincushioning any enemies that try to claim it. Shooting into engagements is golden, their Slow trigger is very easy to pull off, and their Leap Aside Df trigger has made for some of the most cinematic moments of my games so far.
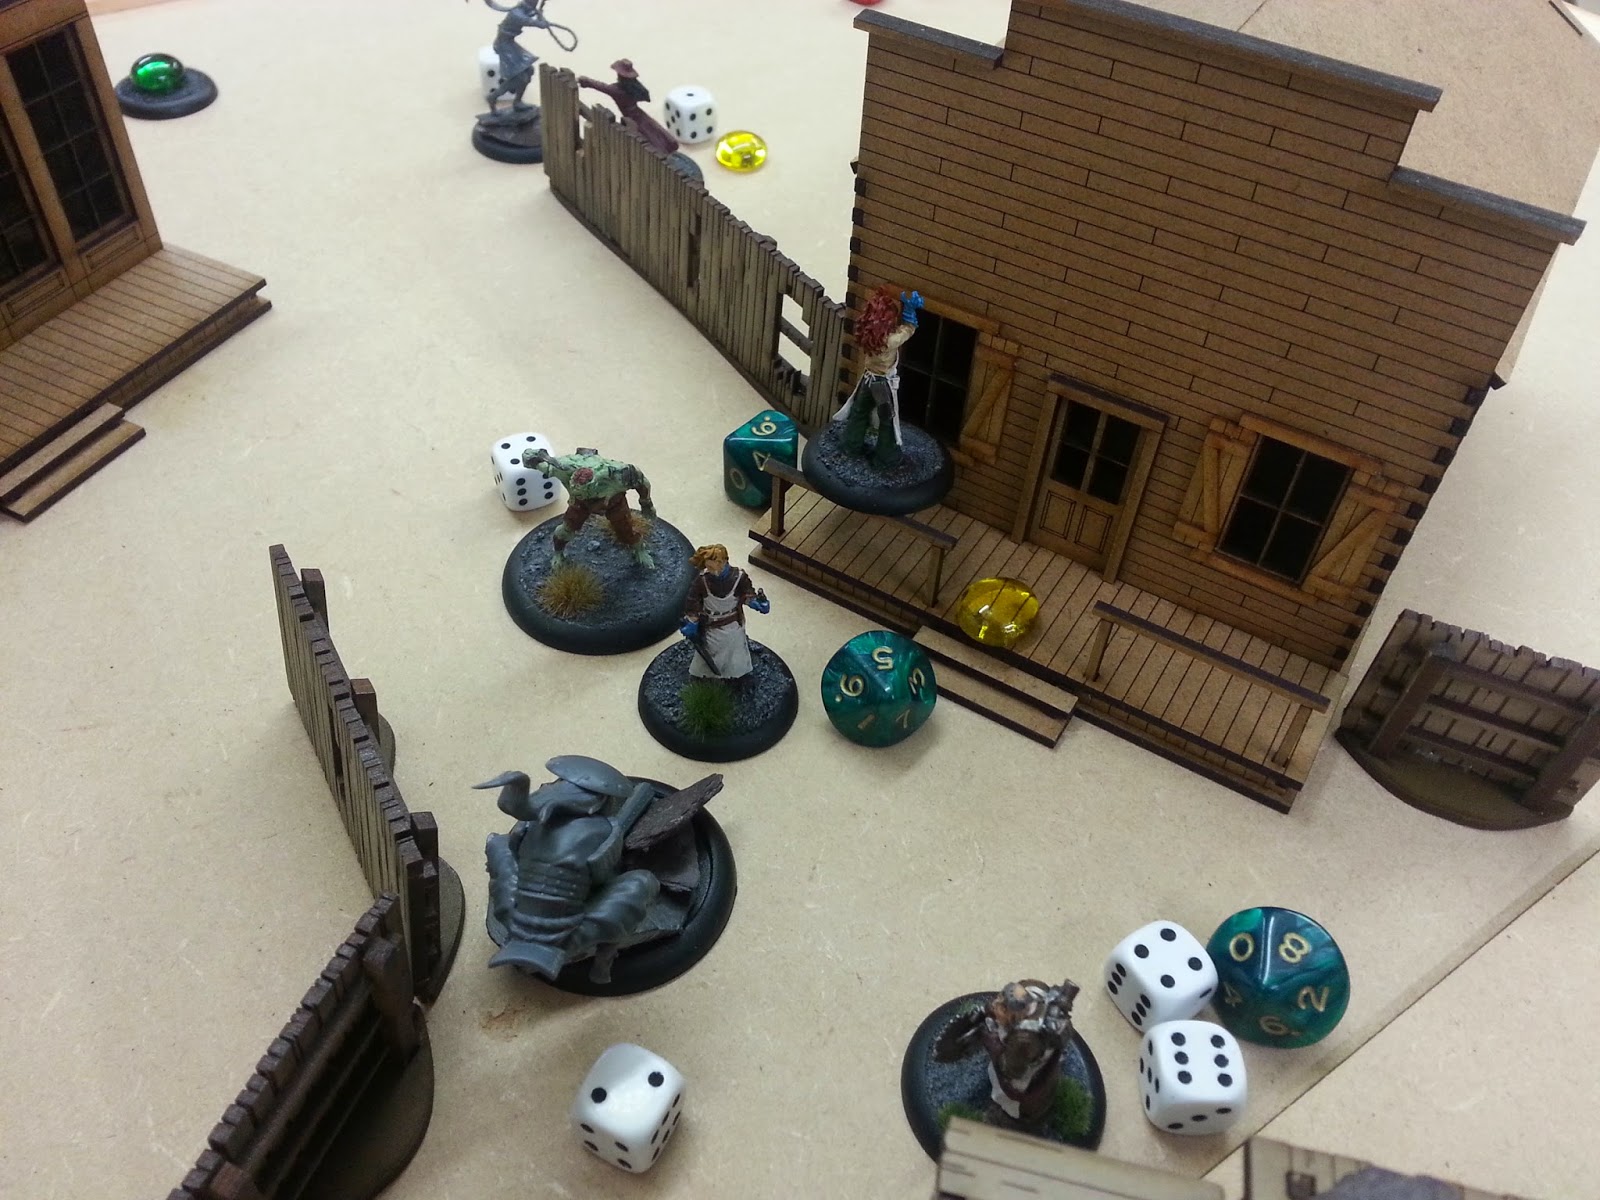
Ototo attempts to take most of a McMourning crew by himself. There's poison everywhere!

Collecting

For Month 2 of the Tale, I'm allowed an extra $25 to put towards new stuff for the crew, which added to my remaining budget from Month 1 gives me $29 to spend.

My preference at the moment is to try and remain 100% plastic, but thankfully for the Ten Thunders this is less of a restriction as the majority of their models are already released in plastic. Less handy is the fact that many of the juiciest minion choices - Illuminated, Rail Workers, Wastrels - are only found in crew boxes that I don't have the budget for. In addition I'd rather focus on Misaki for the time being instead of seguing in to a different Master so soon.

Plastic Ten Thunders available outside of crew boxes are a bit thinner on the ground - Oiran would be nice for slightly cheaper minions to bulk out my activation count and to provide the ever-useful Lure spell, whereas Yamaziko or Ama No Zako would make alternative Henchmen for games where I didn't fancy breaking out Ototo. Alternatively they could be used when I wanted an ultra-elite crew of heavy hitters with multiple Henchmen.

On the bright side, the Ten Thunders range is about to see significant expansion! Fuhatsu, Low River Monks, Samurai and the Dawn Serpent all slated for release in Q2 of this year, which makes me very happy indeed! Fuhatsu in particular looks like he's going to make an incredible model. All the new stuff on the horizon means I'm erring on the side of spending a little less this month, just in case my options open up in Month 3 and I can go wild. With that in mind, my Month 2 spend is therefore:


Previously this lovely lady was an Outcast, but following the conclusion of 2nd Edition Beta she has been given dual faction status - Ten Thunder/Outcast. This is ideal for me because it means she can follow Misaki to whichever faction she declares. Ama brings an attack with a great damage spread and an Obey-type ability which gives me some out-of-activation movement options and control, as well as being nice and survivable with several self-healing effects. Plus she can Swallow gremlins whole!

That being said, I'll admit to being driven mostly by the rule of cool here, I want a big centrepiece model for my crew, and Ama is a huge model that completely fills her 50mm base.

She costs me $16, meaning I can carry forward the remaining $13 to next month for a whopping $38 spending spree! Watch out shops!

Tale of Malifaux Bloggers is a group project in which a small group of players document the process of collecting, painting and playing with their new Malifaux crews over a period of several months. For further information, check out Episode 10 of Chasing Bacon or the introductory post on Play it Like Beatdown . A list of participants can be found on the Wyrd forum thread

Friday, 10 January 2014

085 - Chasing Basing

Greetings and Happy 2014! Welcome to the first post of the new year - and the start of my fourth year blogging Malifaux! To business.....!


I recently managed to get my hands on a solitary plastic Witchling Stalker - a model which has taken the dubious honour of being the first of the "M2E" plastics that I've put paint to.

Still work in progress. Note - my first attempt at NMM is coming along nicely!

With the little guy almost finished, I was faced with an agonising decision - what do I want to do with my basing going forwards? Looking back, my previous bases have lacked flair. I've done:

Flagstones cut from cereal packets on my Neverborn

Sand + dried grass & cacti on my Guild

Greenstuff Sculpted cobblestones on my Ressurectionists

Wooden plank resin bases on my Ten Thunders

You might be seeing the theme....? Flatter than a pancake in the wake of a steamroller!

After casting an eye over some of the available options, I saw something I liked in a Twitter post of @RdeValmont, who has used Micro Arts Studio Cobblestone bases to great effect on his McMourning crew. I was particularly drawn to the way the bases have different height levels, and how the cobblestones themselves extended beyond the edges of the base in an organic way instead of being restricted to clean lines.

I *really* need me some of these sexy new Rotten Belles!

I hopped on over to Element Games and threw a couple of packs into my shopping cart. As per usual from Element, the order arrived at my door quick as a flash, however unfortunately when they arrived there was disappointment in store.

It turns out that Micro Arts Studio has been through a phase of resculpting their resin bases through 2013, and the ones pictured on Element's site (and above being modelled by Belles) are the old versions. The new ones look like this:


Much flatter, and with cobblestones flush with the base edge. In other words - exactly what I didn't want! Element Games were incredibly helpful, and apologetic for the fact that the picture on the store didn't match the item they were sending out (Note: The pictures on the site are still incorrect as of the date of writing - so caveat emptor if placing a resin base order with Element in the near future).

So now it was dilemma time - I could try and source the "old style" bases elsewhere, with the risk that stocks could be limited and I could only get half a crew based, or go back to the drawing board.

As it happens, while their new Cobblestone bases weren't to my liking, the new sculpts of Micro Arts Studio "Old Factory" are actually rather nice indeed. Unlike the "old style" Old Factory bases which, frankly, look like arse.


True to form, Element Games were very obliging and sent out some of the bases on the right as a replacement. I set to work doing my best to come up with the right shade of red brick to start basing my Guild models on.

Hang on a minute.... Red brick.....? Guild models.....?


I've always made a bit of effort to factor in the Faction colour when painting Malifaux. My Pandora has a purple coat. My Perdita has a red halter top. It just feels right.

What if I could escape from that compulsion by theming the models' bases with the faction colour? I'd be free to put whatever colour I wanted on the model itself, and use different bases for different crews, but with a unifying colour for the whole faction.

Micro Arts Red Bricks - Sounds like the building that collapsed on Lady Justice..
Micro Arts Red Tiles - Sonnia doing a bit of rooftop witch-stalking
Desert Red Sandstone - Perdita in the Badlands.

Moving to Ressers, lots of things are green! Eg. verdant green static grass plus gravestones works nicely for Nicodem.

What's that you say? Dual Faction? No problem!

Yan Lo - Green grass plus fallen orange autumnal leaves
McMourning - Green grass plus garden walls of red brick.
Zoraida - Brown cave/mine with protruding purple crystals

The possibilities are endless!

Getting excited now - I'll be back with a picture of a finished model soon!


Tuesday, 6 March 2012

053 - Gremlin Reinforcements Ahoy!

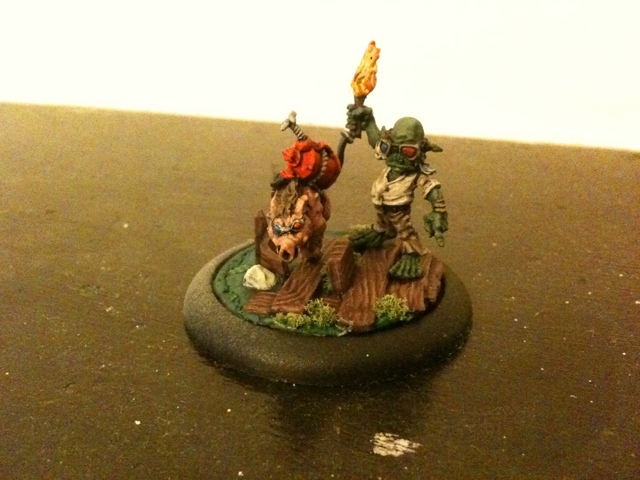
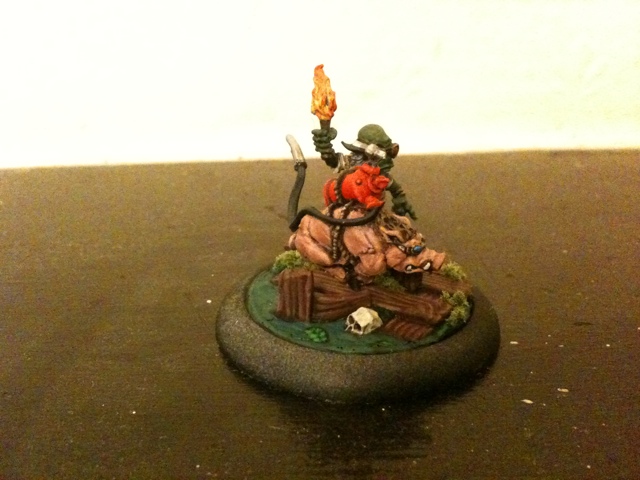
Here's a couple of shots of two recent additions to the ranks of painted Kin - Rami LaCroix and Pere Ravage. I love how the piggy theme pervades Ophelia's crew even though they're a strictly Som'er crew feature and she can't hire them herself.

At first I thought that the 3D glasses were an anachronism, and put them in as a joke, but a bit of research later and I was surprised to find that they were invented by Wilhelm Rollman in Leipzig in 1852!

These guys still need a few reeds sticking on the bases to finish off, but unfortunately my wallpaper pasting brush has gone missing!


Monday, 14 November 2011

037 - Painting Progress Update

With the end of 2011 fast approaching, I thought it would be a good idea to do a bit of a review of my year's painting progress and see where I'm at.

The goal at the start of the year was, as it always is, to only buy as many models as I can paint. Let's see how I did:

2011 Painted
Neverborn

Pandora
The Dreamer
3 Sorrows
Baby Kade
Candy
Doppelganger
Insidious Madness
Lelu
Lilitu
Stitched Together
Coppelius
Teddy

Ressurectionists
Seamus
Sybelle
3 Belles
Grave Spirit
Hanged
Punk Zombie
Onryo
2 Canines

Guild
Francisco
Santiago
Papa Loco

Outcasts
Bayou Gremlin
Ophelia
Warpig

Others
2 Eden Bamaka Clan
3 Heresy Doctor Who figures

That's a total of 36 painted models, giving me average rate of 0.8 models per week to date. I'm actually pretty surprised that I've managed almost one model a week, as there have been a couple of months this year when it's felt like I've made no progress at all, especially recently.

As far as not buying too many models I have, as I always do, failed to keep to this plan, succumbed to shiny stuff syndrome and treated myself to way too many toy soldiers for my incredibly sluggish painting speed to keep up with. The current count is 48 unpainted or part painted models waiting to be made table-ready, including complete crews for both Rasputina and Somer Teeth/Ophelia as well as quite a big pile of Ressurectionist reinforcements.

Since this means I'm 43% through my current collection, I think a reasonable target for the end of the year will be to reach 50%. I'll need to paint 6 more models over the next 7 weeks - doable at my current rate, but with no room for slacking! I'll also need to make sure I don't buy any more figures, or if I do, that I get some extra painting done to compensate!

Sunday, 18 September 2011

032 - Painting Update & My Workstation

Not much of an update today, just thought I'd share a work-in-progress picture of what I'm currently painting, and give you a behind the scenes look at my workstation.

I'm currently working on Gremlin models, and painting a mix of So'mer Teeth and Ophelia models. Here's Ophelia with her base complete and some initial work on the Henchlady herself. The Bayou Gremline is complete and only there so I can make sure the colour schemes stay consistant. I think I've already failed though and need to go back to Ophelia's shoes to make them a more muted brown, so that the crews tie together visually.


Here's some pictures of the rest of the stuff that crowds my painting workstation. It's only an extremely tiny portable table with wobbly legs, which I use to paint in the living room in front of the tv. I don't really have a permanent space to go and paint where I could spread out a bit more and be able to keep things tidier, because I prefer to sit and paint on the sofa and keep the girlfriend company.
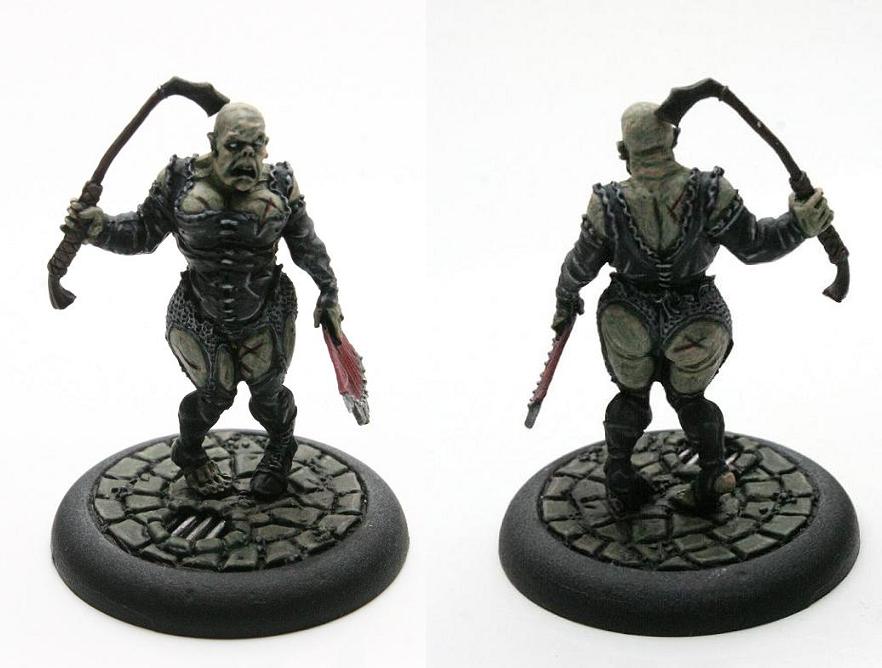
Filling up the space at the moment you can see various other Gremlin models, including some almost finished flying piglets. Also in the queue you can see Nightmare Teddy that I've made a start on, a half finished Shikome, and a couple of Doctor Who models that I'm assembling ready to teach the missus to paint. I made her a Doctor Who diorama (Matt Smith, Karen Gillan & the Tardis) last Chrismas which she really liked, so they seemed like a good choice for her to have a go at painting her first models.

The wet palette and water jar take up a lot of space, and when painting in the evening I often try to squeeze a posable lamp on the table too, so space is at a premium! Tools and paints wise, I try to keep most of my stuff in a box behind the sofa and only pull out colours when I need them, until gradually the table gets filled up and I pack them all away again until needed.


Well there you go, a bit of an insight into my living room. Hope it was of interest!

Mike

Monday, 29 August 2011

028 - "Never Happen...."

Firstly - apologies for the lack of posting recently. I moved house a few weeks back and I've only just this week gotten my shiny new broadband connection up and running.

Now onto business. A couple of weeks ago I entered the Iron Owl painting competition at Leeds Wargaming Center. I'd been working on something special for a while, and although I didn't win anything (the standard was very very high), I was really happy with how my entry turned out and gave me a great opportunity to develop some basic conversion skills.

One of the more amusing Malifaux abilities is called "Never Happen..." and is found on the Gremlin Hog Whisperer. Basically, it gives all friendly pigs within 12" the ability of Flight. To me this was crying out for a comically customised model, so I decided I was going to give my first Warpig some wings. Here's the final result:


I figured it'd be worthwhile showing everyone how he was made in case other people decide to do something similar.

The hardest part of the conversion was the legs so this was the part I tackled first. The Warpig comes in two halves, and the rear leg on each side is what he usually stands on, with his front legs raised off the ground as though he's charging or pouncing.


I quickly realised that if I was to raise him into a flying pose, the back legs would look totally wrong, as he would still be in a standing position with his feet flat as though they were on solid ground. I therefore decided to cut off the back legs with my trusty hacksaw, and alter their position so as to look like they were hanging down naturally when he was up in the air. I had to take a pretty big chunk out of the back of each side of the model in order to get these legs off, including destroying most of the muscles in the rear end, but I planned to resculpt them back on later. Admittedly I was quite worried after seeing my new model cut into small chunks!

On the pigs left flank, the leg turned and re-attached easily enough in it's new position without needing modification to the leg itself.


Unfortunately the right hind leg is sculpted in a bent position and needed some further work to get it to look natural. I cut into the leg at the knee joint and again at the ankle to split it into three pieces, which were rearranged into a completely new shape. Both legs were pinned back onto the body for extra strength.


The rest of the pig was assembled normally. Regrettably this model is one of those that never fits together very well, and there were loads gaps around the head and tail that needed plenty of green-stuff to fill in.

The crucial addition to my Warpig would be the wings, and I searched for a long time to find the right ones. At one point I was leaning towards the large feathered wings from Micro Art Studio, but they looked heavy and I wasn't sure they would be the right size. I toyed with the idea of stealing the wings from a GW Bretonnian Pegasus Knight, and tried to find these parts on some Bitz websites, but they appeared to be the most popular part of the kit and were always out of stock.

Despairing that my porcine friend would never be able to get airborne, I stopped by my local GW and told a staff member that I wasn't as familiar with the current range as I used to be and did he have any ideas? On their in-shop painting station they had some WIP new Dark Eldar Scourges and I knew right away I'd found my wings! I snapped up a box there and then and luckily, after choosing the right pair of wings for me (I definitely didn't want the bat wings) managed to sell the rest of the models on to Darren at the local club who wanted them for his Dark Eldar army. Win-win!

GW still make the best plastic miniatures around - hands down

The wings had a few cables and mechanical looking parts that needed carefully scraping off with a craft knife, following which I did my best to resculpt some feathers where the damage had been done. All that remained was to drill a hole for a 2mm brass rod in the base of the pig and mount him to a Wyrd Bayou 50mm base insert.


You can see at this point I had the wings in a different position. Thankfully my girlfriend convinced me to raise them up and outstretched which I realise now is a far better pose.

I got a big carried away at this point and forgot to take a picture of the model after I'd re-sculpted the hind leg muscles, but you can see the results in the final photos below.


As one of my first real conversion efforts I'm incredibly pleased with the final result, and I hope I've inspired someone to try something similar with their own pigs.

Until next time... oink oink!

Mike

Thursday, 7 July 2011

022 - Unfocused minion painting

My painting has been a little erratic in recent weeks, with lots of projects on the go and far too many models in my painting queue. Here's a few of my recent efforts:

Some Guild Ortegas. The plan is for these to be my other demo crew, along with Seamus. I've already got a friend looking for an intro game, so the rest of these are quite high on the priority list to get finished.


A couple of Neverborn that I painted a few weeks ago for a tournament. They work nicely with Pandora, and they'll fit perfectly into my future Dreamer crew too. The rest of the unpainted Neverborn I currently have are shifted to low priority.


Lastly here's the first test model for my next main crew. This is also the first real test case for my upgraded painting equipment and my first ever base insert. I'm really happy with the results! The plan is for a Gremlin crew to be ready for the UK Grand Tournament in November, so there's a long way to go yet. However given my painting speed, and the number of models required, I think Gremlins also need to be high priority!


Watch this space for more pictures soon(ish)!

Tuesday, 14 June 2011

018 - The Iron Owl Trophy

Just a quick plug for The Iron Owl, which is a painting competition that will be held on August 6th at the Leeds Wargaming Center. It's being organised by Wayne of the Night Owls club who, being a Golden Demon standard painter himself, wants to promote the creative side of the hobby within the local area.

There will be at least two prizes, one awarded by the judges and another for the winner of a public vote. A variety of stuff is on offer to be split between the winners, including models from the Malifaux, Kings of War, Infinity and Warmachine ranges.

There are no categories, just one big Open competition. I've already made a start on my entry....

If you live anywhere close to Leeds, you might be interested in popping by and either entering yourself or having a nosey at the work of what are bound to be the most talented painters in the area.

Mike

Monday, 23 May 2011

016 - Raising the Bar

So, with my Rezzers more or less complete (for the time being anyway), I'm now looking at other projects.

First on the list is the Malifaux tournament at the UK Games Expo in Birmingham in two weeks time. I'll be taking Pandora, as she's been neglected over the last couple of months while Seamus has had all the fun. Since I'll be choosing my crew each game from a 55ss pool of minions, I'm going to try and paint up a couple more Neverborn models for her before the 4th June to give me a bit more flexibility.

At that point I'll be working on my next crew - I've already bought the boxed set and made a start on the assembly. As for a clue to who this crew will be... well lets just say I've had to stock up on green paint...

For these new models I've decided that I want to bring my painting to the next level. I'm very proud of what I'm achieving so far, but I feel like I'm not improving, just repeating stuff I can already do and staying within my comfort zone.

To that end, here's my list of Objectives for painting my new crew:

1) Proper blending. At the moment I'm slapping on a couple of highlights without too much effort. I'd like to increase the number of highlights to 4-5, and build up enough confidence to move further away from my base colour in the highlighting shades.

2) More detailed bases. Although I really like how my sculpted sewer bases came out, they were rather drab, and so I want to pull out the stops and go crazy with detailed bases. This may involve using base inserts then adding some extra personal touches. I think this will be the most important step to being more competitive in future painting competitions.

3) Conversions. I'm not very confident with conversions and sculpting beyond basic weapon swaps and gap filling. I want to get my feet wet with some proper conversions.

My first step towards Objective 1 has been investing in some proper gear. My tatty old GW detail brush has been relegated to "undercoating only" (sorry old faithful, but you were losing hair like a scabby cat, and its a long long time since you held a point!) and I've ordered a Winsor Series 7 Kolinsky Sable (0) brush. From what I've read around various forums, these brushes are the Big Daddy when it comes to great paintjobs and I can't wait to try it out!

Step two has been the construction of a simple wet palette, which is going to help me with that blending. By keeping my mixed colours usable for much longer than using an old piece of tile or, more often, the back of my thumb (yes I know it's lazy - hence the change!) I'll also be using my paint more economically.

Here's how I made it.

Wet Palette
Ingredients:
Plastic container that formerly held Chinese food (Kung Po Chicken yum yum), or a similar Tupperware box.
Asda's greaseproof paper
Sheet of grey sponge from a Malifaux crew box


Place the foam in the tray, then trickle water into it until it's just on the edge of floating.


Cut a sheet of paper to the right size and place it on top, then press it down so that it sticks all over.


And you're done!


Paint applied to the paper won't dry for a very long time. The greaseproof paper is semi-permeable - enough water gets through that it stays wet for hours. Sealing the lid on top of the container stops any moisture escaping and then the paint stays wet for days! It does seperate slightly if you've mixed a colour, but can be easily mixed back together again when you come to re-use it. It's absolute genius and I can't believe it's taken me this long to get myself one.

All being well, I hope to be showing off the first results of this next chapter in my painting career in the near future!

Mike

Wednesday, 13 April 2011

014 - Madame Sybelle, Mistress of Pain


Here's a close up look at the finished Madame Sybelle, my first Ressurectionist model.

I took some time over the highlights on her PVC clothing to try and make it look different to just normal black cloth. The highlights are quite extreme and linear and there's practically no blending. For her skin, I didn't really pre-plan the colour, I just slapped a green wash over Dwarf Flesh and then re-highlighted with Elf Flesh. I think it looks suitably rotting, and the white eyes make her look nice and zombified.

I'm quite happy with the base, which was made with a chopped up paperclip and some Green Stuff that I scraped into with a pin. I don't have much sculpting experience so the result is a little choppy. Although a cobblestone base insert would probably give the same effect and look tidier overall, I like the fact that my bases will have that unique touch.

So, what do you think? Does she float your boat?

Mike

Friday, 1 April 2011

012 - Mister Oogie Boogie

Just a quick update on the most recent addition to my Neverborn crew, the Stitched-Together. He was another quite simple model to paint, being that he's 90% brown. At first I had some trouble with the main colour in that after highlighting, it just looked like brown skin.

However, I found that by going all over the model with thin dark brown lines, it gives the impression of a hessian sack, at least from the other side of the table.


I was especially proud of this guy's performance in a recent game (see my last post). It seems that by activating him towards the end of my turn, I can use his gambling abilities to replenish my Control Hand. Assuming my opponent is also running low on cards by that point, I may be able to cheat on Gamble Your Life which has a severe damage of seven! I haven't yet had opportunity to use his Line of Sight blocking skills, but it's another talent up his sleeve for next time. Another of these is on the painting table, with the aim of getting Lord Chompy Bits up and running in the next month or so. Watch this space!

Mike

Saturday, 12 March 2011

008 - If You Go Down in the Woods Today...

"If you go down in the woods today,
You're sure of a big surprise.
If you go down in the woods today,
You'd better go in disguise.

Today's the day that Teddy will bite your face off"


The latest addition to my Neverborn crew, Teddy was a lot of fun to paint. There isn't a lot of detail on the model, and I kept it very simple. He's painted as a panda to match the teddy carried by his best buddy Baby Kade.

I didn't like the "care-bear" heart shaped spot on his chest, so that was filled in with Green Stuff and sculpted to blend into his fur.

Another lovely model, I have a feeling this guy is going to be a permanent feature on Pandora's team!

Sunday, 20 February 2011

003 - Meet the Neverborn

There I was, happily painting my way through legions of Imperial Guardsmen and Leman Russ tanks, eagerly looking forward to having the army finished by the new year and ready to join the local gaming club, the Leeds Night Owls to learn how to play 40k, when I was bitten by the Neverborn bug!

While browsing their forums I came across mention of the game of Malifaux, and a quick Google search led me to this picture of the creepy little serial killing baby known as "Baby Kade". My curiosity immediately piqued, I delved further, and after discovering he partners with a giant carnivorous Teddy Bear(!!), I knew I had to try this game and that my starting faction couldn't be anything else but the Neverborn. I immediately picked up a Legion of Sorrows box set which would allow me to start playing straight away.

My Crew
Pandora
Owner of the legendary Box, Pandora is one of the 4 currently available Neverborn Masters, and plays completely differently to any other master in the game. By opening the Box, Pandora unleashes the worst fears and emotions of her enemies, who literally kill themselves with self-loathing and pity. She can also be incredibly fast, appearing and disappearing before the enemy crew has time to react, and her style is very much "death by a thousand cuts", preferring to chip away at the health of enemy models 1 Wd at a time, rather than wade in and hit things hard with a big sword (that's Lilith's job!)


I painted Pandora in a similar scheme to the example in the Malifaux book. I had experimented with a few different colours for her dress, including red and white, but nothing seemed to look right, so I settled on the cream colour.
The magical flame emerging from the open box is actually half the size of the one the model comes supplied with. I felt that putting the whole piece on obscured the rest of the model, so I snipped off the bottom half and only used the tip of the fire. The fire was painted GW Jade Green, a colour which I carried through to the whole crew in small amounts, to give a unified scheme.

Coat: Liche Purple/Liche Purple+Skull White
Dress/Leg Wraps: Graveyard Earth/Bleached Bone
Skin: Dark Flesh/Dwarf Flesh/Elf Flesh
Hair: Chaos Black/Skull White streaks

Pandora's base was made by cutting out sections of cardboard from a cereal packet in the shapes of flagstones, and glueing them on with PVA. This was then drybrushed to resemble stone, and a few tufts of static grass added to finish the effect.


Candy
Candy is the Woe of Innocence Corrupted, and she features in the top right corner of this blog in Voodoo-doll form. Candy hates humans, and those she cannot ensnare with poisoned sweets often fall foul of her ability to use her victims guilt and regret against them.
I decided to paint my Neverborn children with regular skin tones, instead of the pallid, undead looking skin in the Malifaux book, as I didn't want them to look like zombies, especially when I might consider painting zombies in a Ressurectionist crew in the future. Plus I figure that if they look like real children then it's even more scary!


Pink Dress: Blood Red+Skull White, highlighted with extra Skull White
White Frills: Fortress Grey/Skull White
Hair: Bestial Brown/Sunburst Yellow
Skin: Dark Flesh/Dwarf Flesh/Elf Flesh

Candy's lollipop was painted with a Jade Green spiral pattern, she was based with the same cardboard flagstones as Pandora.


Baby Kade
Kade is the Woe of Innocence Lost, and he delights in pretending to be a baby to lure his victims to their death, which he dispenses with a gigantic (to him at least!) carving knife. While not the strongest melee fighter available to Pandora, if he gets the right triggers at the right time, he can be deadly. Plus, isn't he just so CUTE? The model is one of the tiniest things I've painted, but I still wanted to pull off a nice paint job, so he took a lot of time to get right.


I painted his teddy bear in the colours of a panda, as I intend to add Teddy to the crew soon, and he will also be painted as a great big evil (but cuddly) panda.

Skin: Dark Flesh/Dwarf Flesh/Elf Flesh
Nappy: Fortress Grey/Skull White

I did my best to make his eyes look as deranged as possible, by painting small pupils in the centre of his big round eyes.


Sorrows
These guys are minor Woes, basically backup for Pandora and friends, and they don't have any particularly special abilities in themselves. Their main use is in linking up to the main crew members in order to borrow their more effective spells, and absorb damage from enemies attacks. I painted them slightly different to the pictures on the box, because I didn't like the bright green colour that made them look like Slimer from the Ghostbusters.


Shadows Layer: Dark Angels Green
Base/Middle Layer: Jade Green
Highlight Layer: Rotting Flesh

The protruding tongues and eyes were painted with Scab Red followed by Blood Red highlights. Lastly, the bases were finished off with cardboard flagstones and static grass

The next addition to the crew is going to be Teddy, following which I'm leaning towards a couple of Stitched Together, who appear to work well with Pandora's Willpower based mechanics.